File Component
The file component is ideal for uploading files that aren’t images or video. The files thus uploaded will only be stored and won’t be transformed or transcoded in any way.
File Component Usage
Whenever you upload files to Crystallize, they’re added to a content delivery network (CDN) for speed and ease of access. Most of the time, some sort of processing is performed on these files: videos are encoded for streaming, while images are transcoded and resized.
There may be times when you simply want to upload files to the CDN without any changes being made to them. You may also want to require that certain files must be uploaded, and that they’re of a specific format. For instance, you may want every product in your store to have a user manual PDF available for customers to browse.

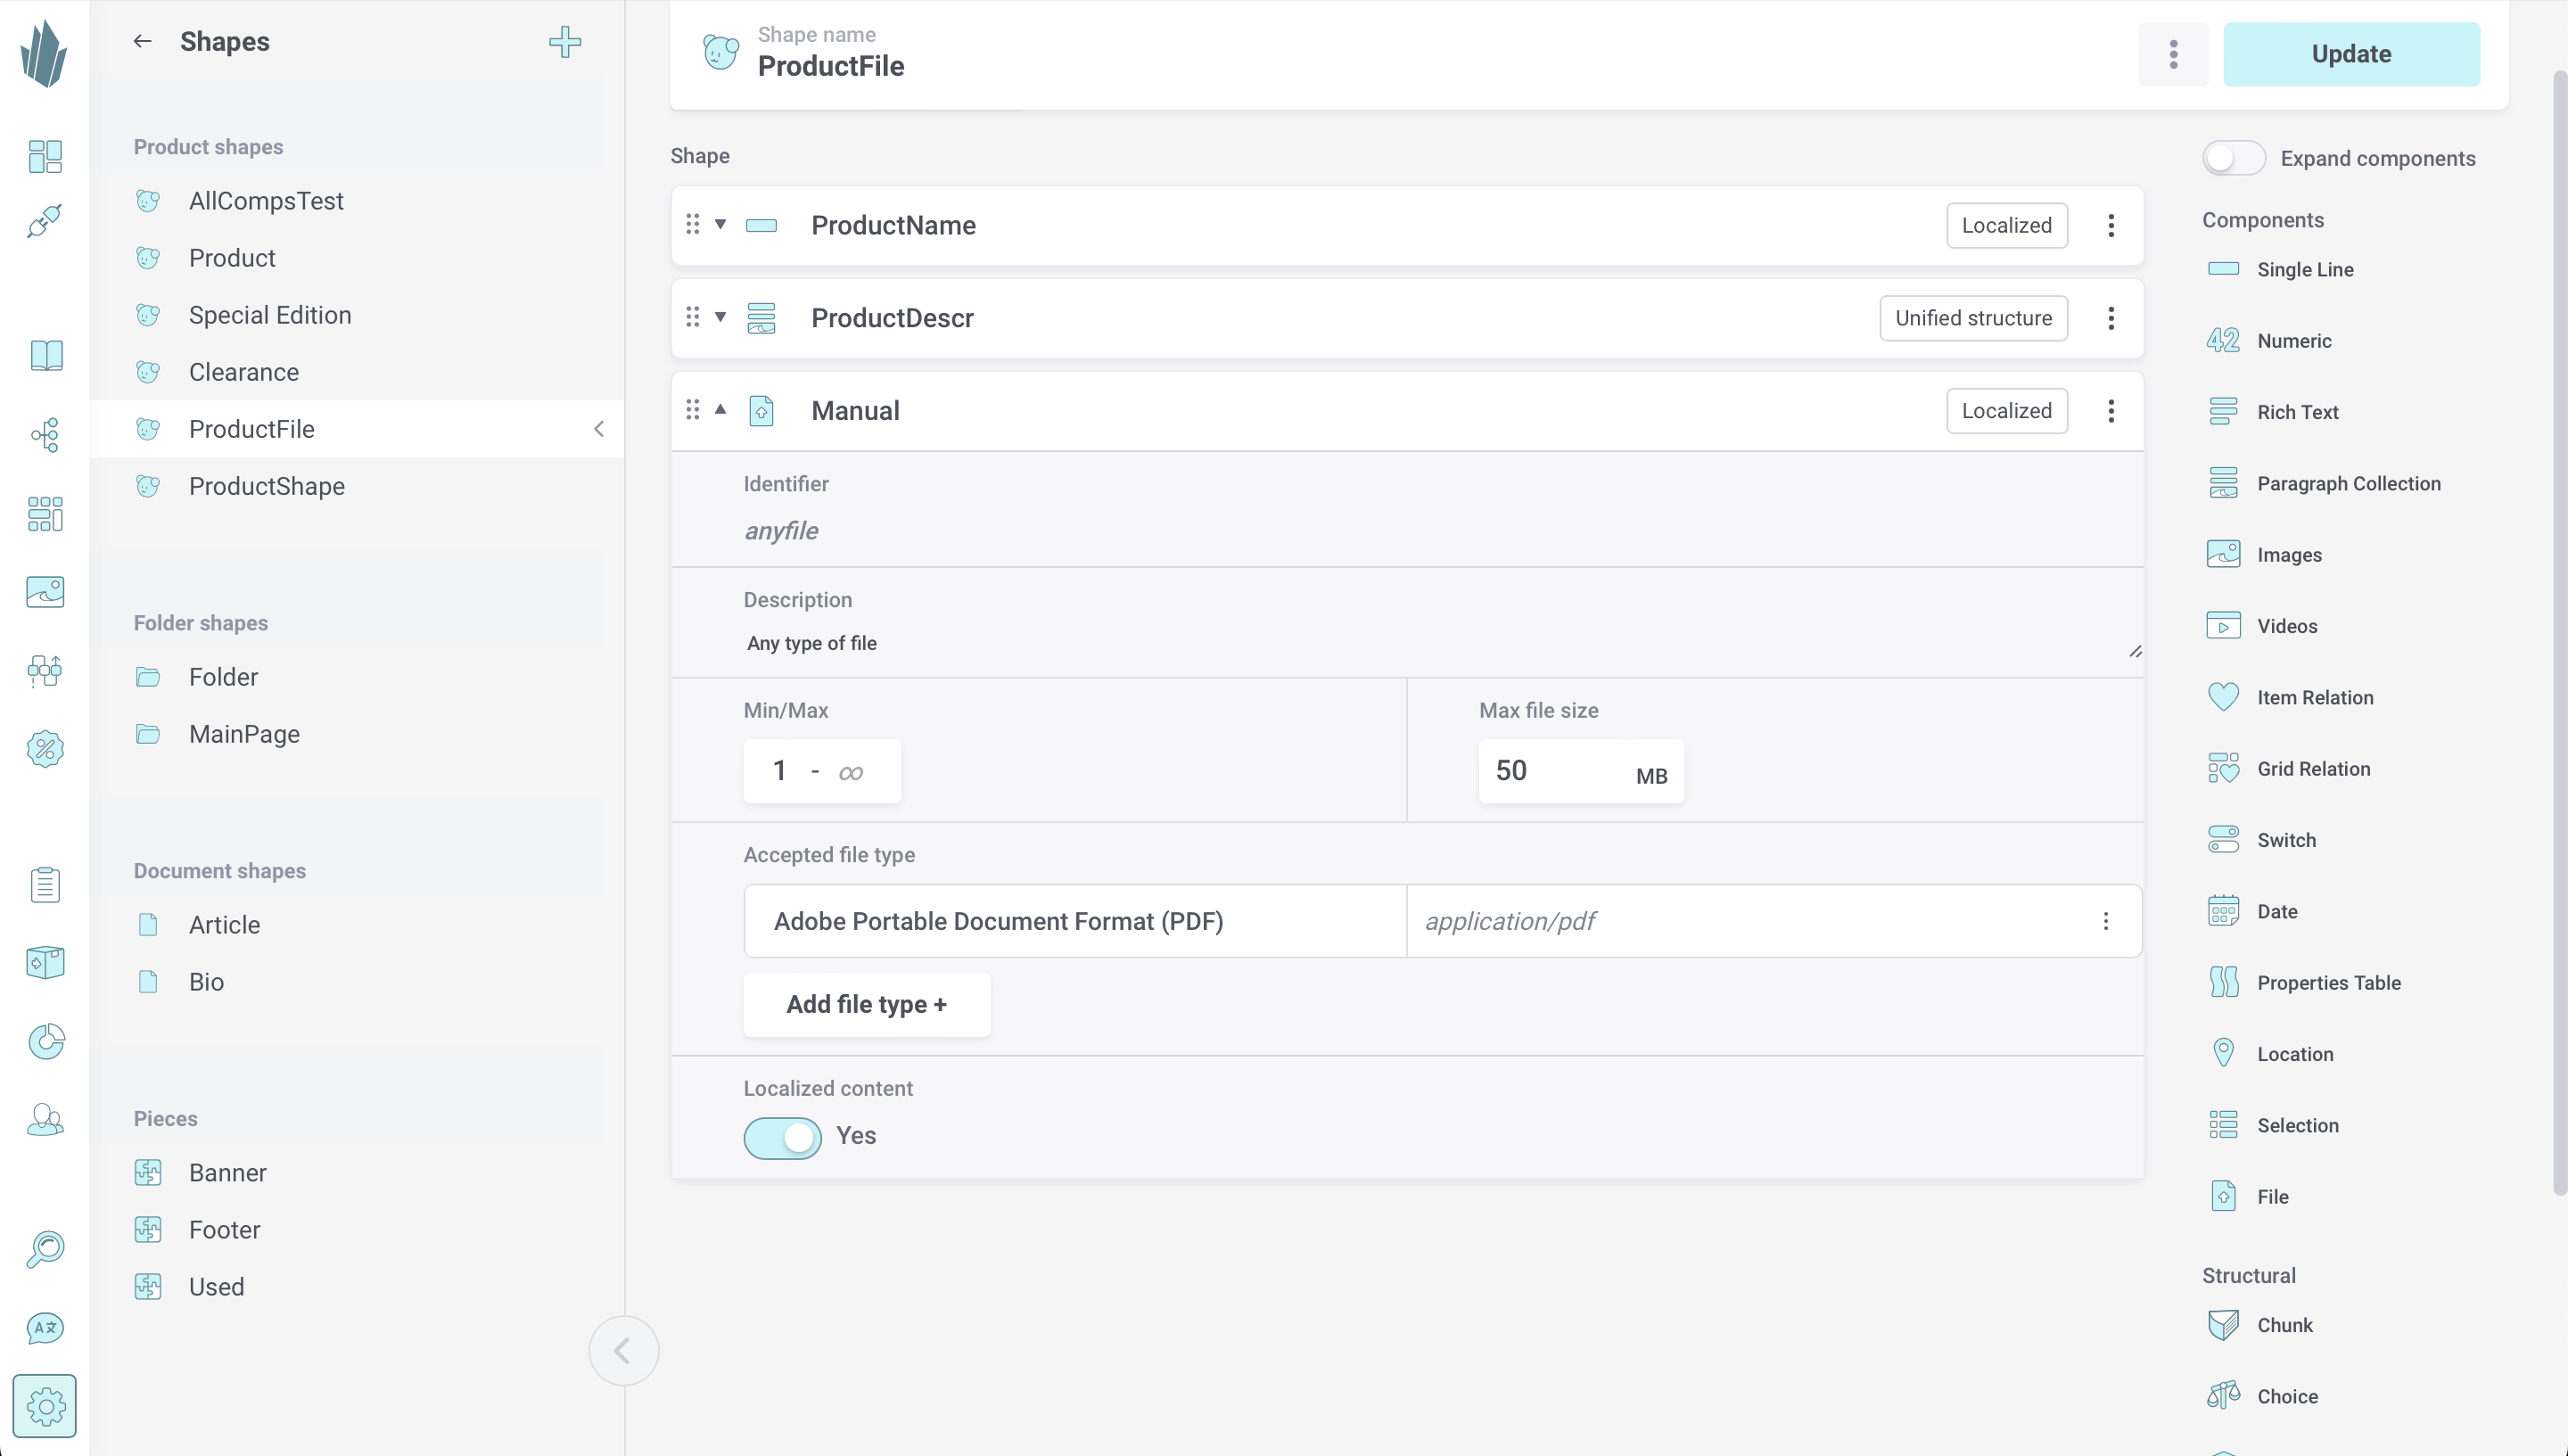
Once you add a file component to a shape or piece, you can configure the following:
- Name (required) - A name for the component.
- Identifier - String that will be generated based on the component name when shape/piece is created or updated. You’ll use the identifier to reference the component programmatically.
- Description - An optional description of what the component should contain. This will be visible to anyone who adds content to the component later.
- Min/Max - Click beneath the Min/Max label to access a drop-down where you can optionally edit the lower and upper range. By default, no files are required (Min = 0) and the component will allow you to upload as many files as you want (Max = ∞).
- Max file size - Use the arrow keys or type into the box to specify a maximum size per file in MB. 50 MB is both the default and maximum file size limit. (If you require a higher file size limit, please contact us).
- Accepted file type - By default, any file format will be permitted. To restrict files to certain MIME type(s), click the Add file type + button to add a file type box, then click on the words File type to reveal a list of file formats and a box that you can type into. You can choose from the formats listed or specify a custom format by scrolling all the way down to the Create your own+ option. Remove MIME types by clicking the X in the top-right corner of each File type box.
- Localized Content - If Yes, then you can store different files for each language set up within your tenant. If No, then the same file(s) will be shared across all languages.
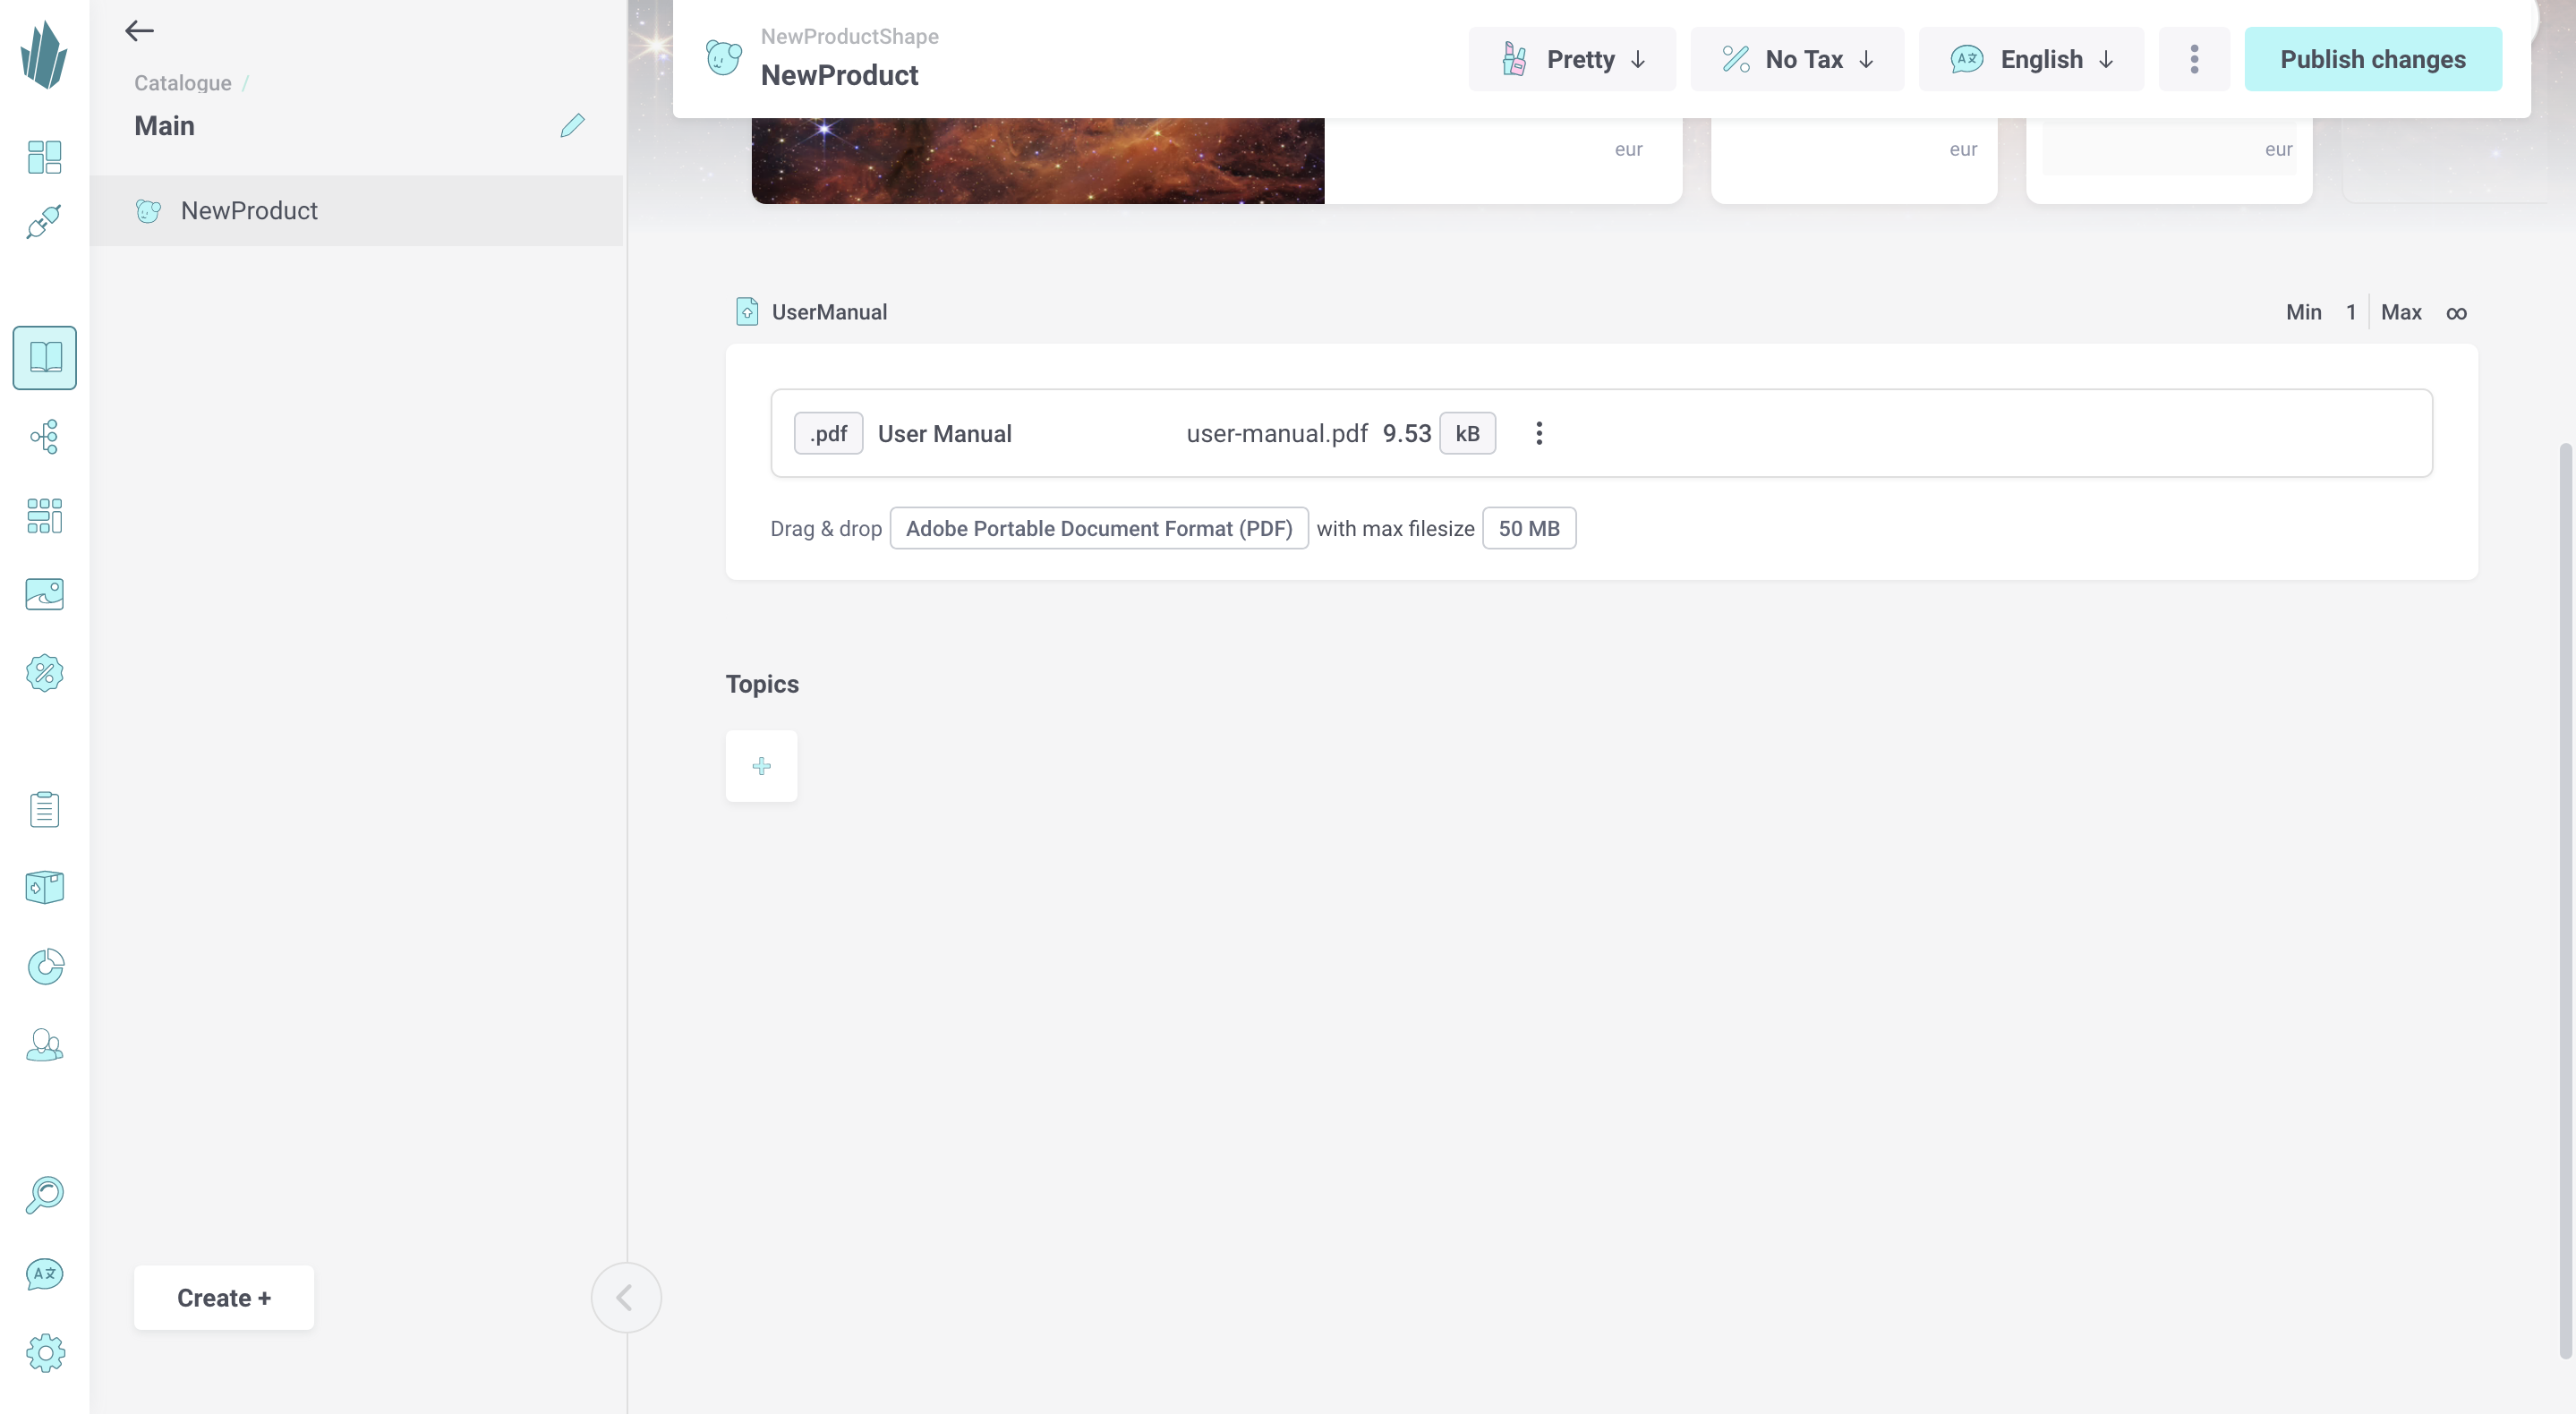
When creating or editing a product, document, or folder with a file component, you’ll find an interface like this:

In the case where a minimum number of files must be uploaded, you’ll be warned of the requirement that must be fulfilled. All changes will still be saved, but you won’t be able to publish them until the requirement is met.
To add files, either drag and drop them into the window or click Browse local files to browse your local machine/network. Any files that don’t match the MIME type(s) you configured earlier will be grayed out and can’t be selected.
Once you successfully upload a file, you’ll see its name and attributes listed. Clicking on the action button (...) provides options for downloading and deleting the file.
What happens if the number of files uploaded exceeds your maximum limit? As it turns out, you can keep uploading files past the limit, but you’ll be unable to publish until enough files are deleted to return to within the limit. This is for cases in which someone else might have to come along and make a decision as to which of the files should be kept.
Catalogue API Access
Once created, file component content is accessible via the Catalogue API. Refer to our sample query for retrieving file component data, and to the API docs at https://api.crystallize.com/your-tenant-identifier/catalogue for more information.
